
What Content Hub does: Content Hub is where you create content that helps AI recommend your products. The idea is simple: when AI overlooks you for a shopping topic, an article that answers that topic’s buyer questions — and features the right product — gives AI something to cite. This is the “get chosen” play in article form, aimed straight at the topics where you’re currently invisible. 1. Open Content Hub. From the left menu, under Content, click Content Hub. You’ll land on your article list — everything you’ve created, with its status, word count, and date.
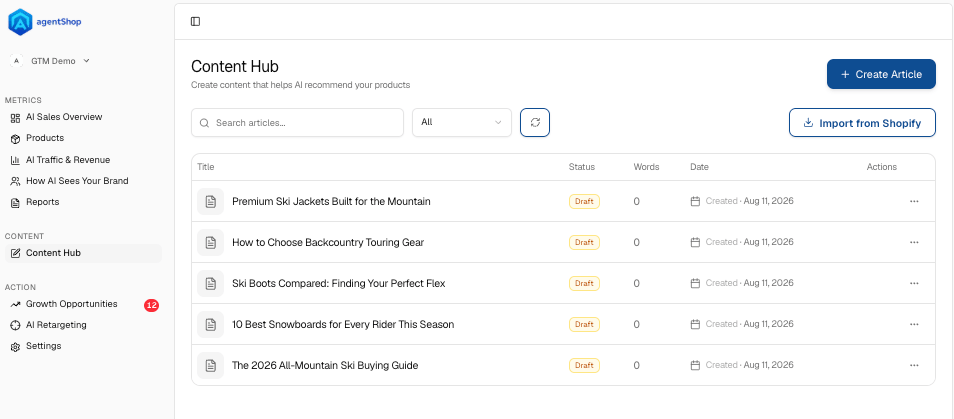
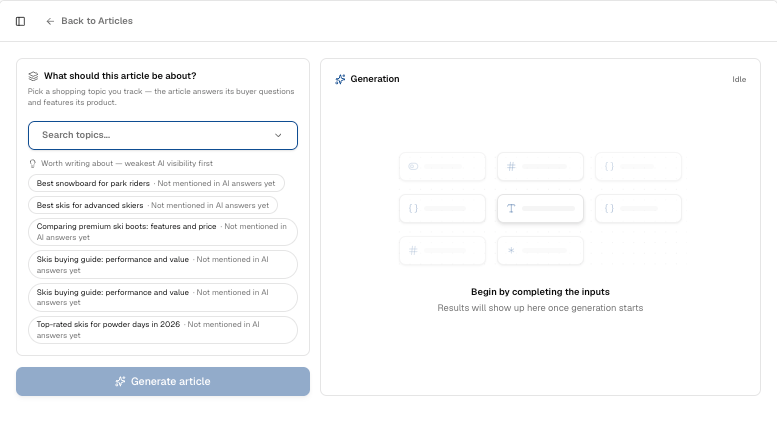
2. Scan your existing articles. Each article shows a StatusDraft or Needs review — plus Words and the date it was created. Use search and the filter to find one, or the menu on any row to open, edit, or manage it. Needs review means it’s written but not signed off yet. 3. (Optional) Import from Shopify. Already have blog content? Click Import from Shopify to pull it in instead of starting from scratch — useful when you want to optimize existing posts rather than write new ones. 4. Start a new article. Click Create Article in the top right to open the generator. 5. Pick a topic to write about. Under What should this article be about?, choose a shopping topic you track. The article will answer that topic’s buyer questions and feature its product. Search for a topic, or pick from the suggested list.
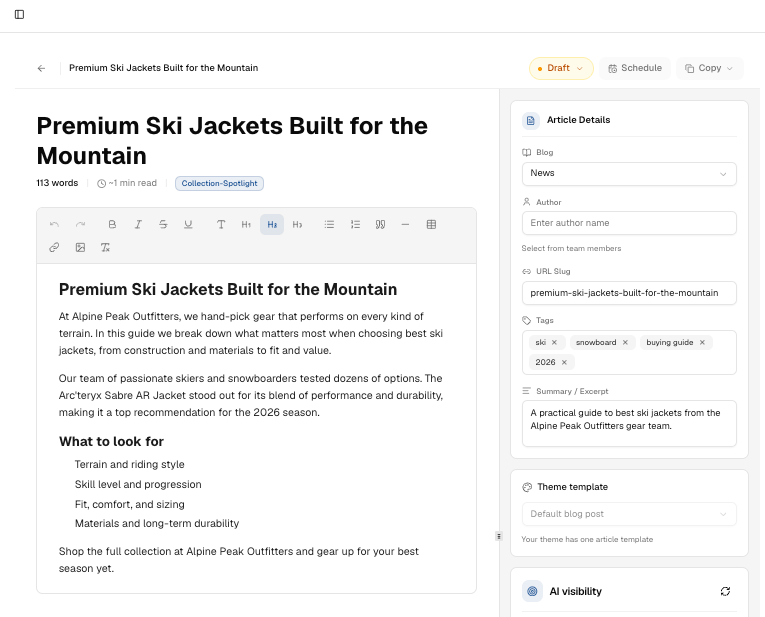
6. Go after your weakest visibility first. The suggestions are sorted weakest AI visibility first, and topics flagged “Not mentioned in AI answers yet” are your biggest gaps — the questions shoppers ask where AI never brings you up. Writing for those is where a single article moves the needle most. 7. Generate the article. Click Generate article. The draft builds in the Generation panel on the right — it stays idle until you’ve picked a topic, then fills in as it writes. 8. Review before it ships. New articles land as a Draft or Needs review — that’s your cue, not your finish line. To open one, use the row’s ⋯ menu → Edit (the row menu only offers Edit and Delete). Read it, check the facts and product claims, and edit in your voice before anything goes live. Nothing publishes without a human sign-off.
9. Publish to your store. Publishing happens inside the article editor, not the list. In the editor: set the Blog it should post to and the Theme template; the URL slug is generated by Shopify on publish. The controls are top-right — a status control (Draft → Pending Review → Published) and a Schedule button if you want to publish later. Once the article is live on your Shopify blog, agentShop starts tracking whether AI assistants cite it.